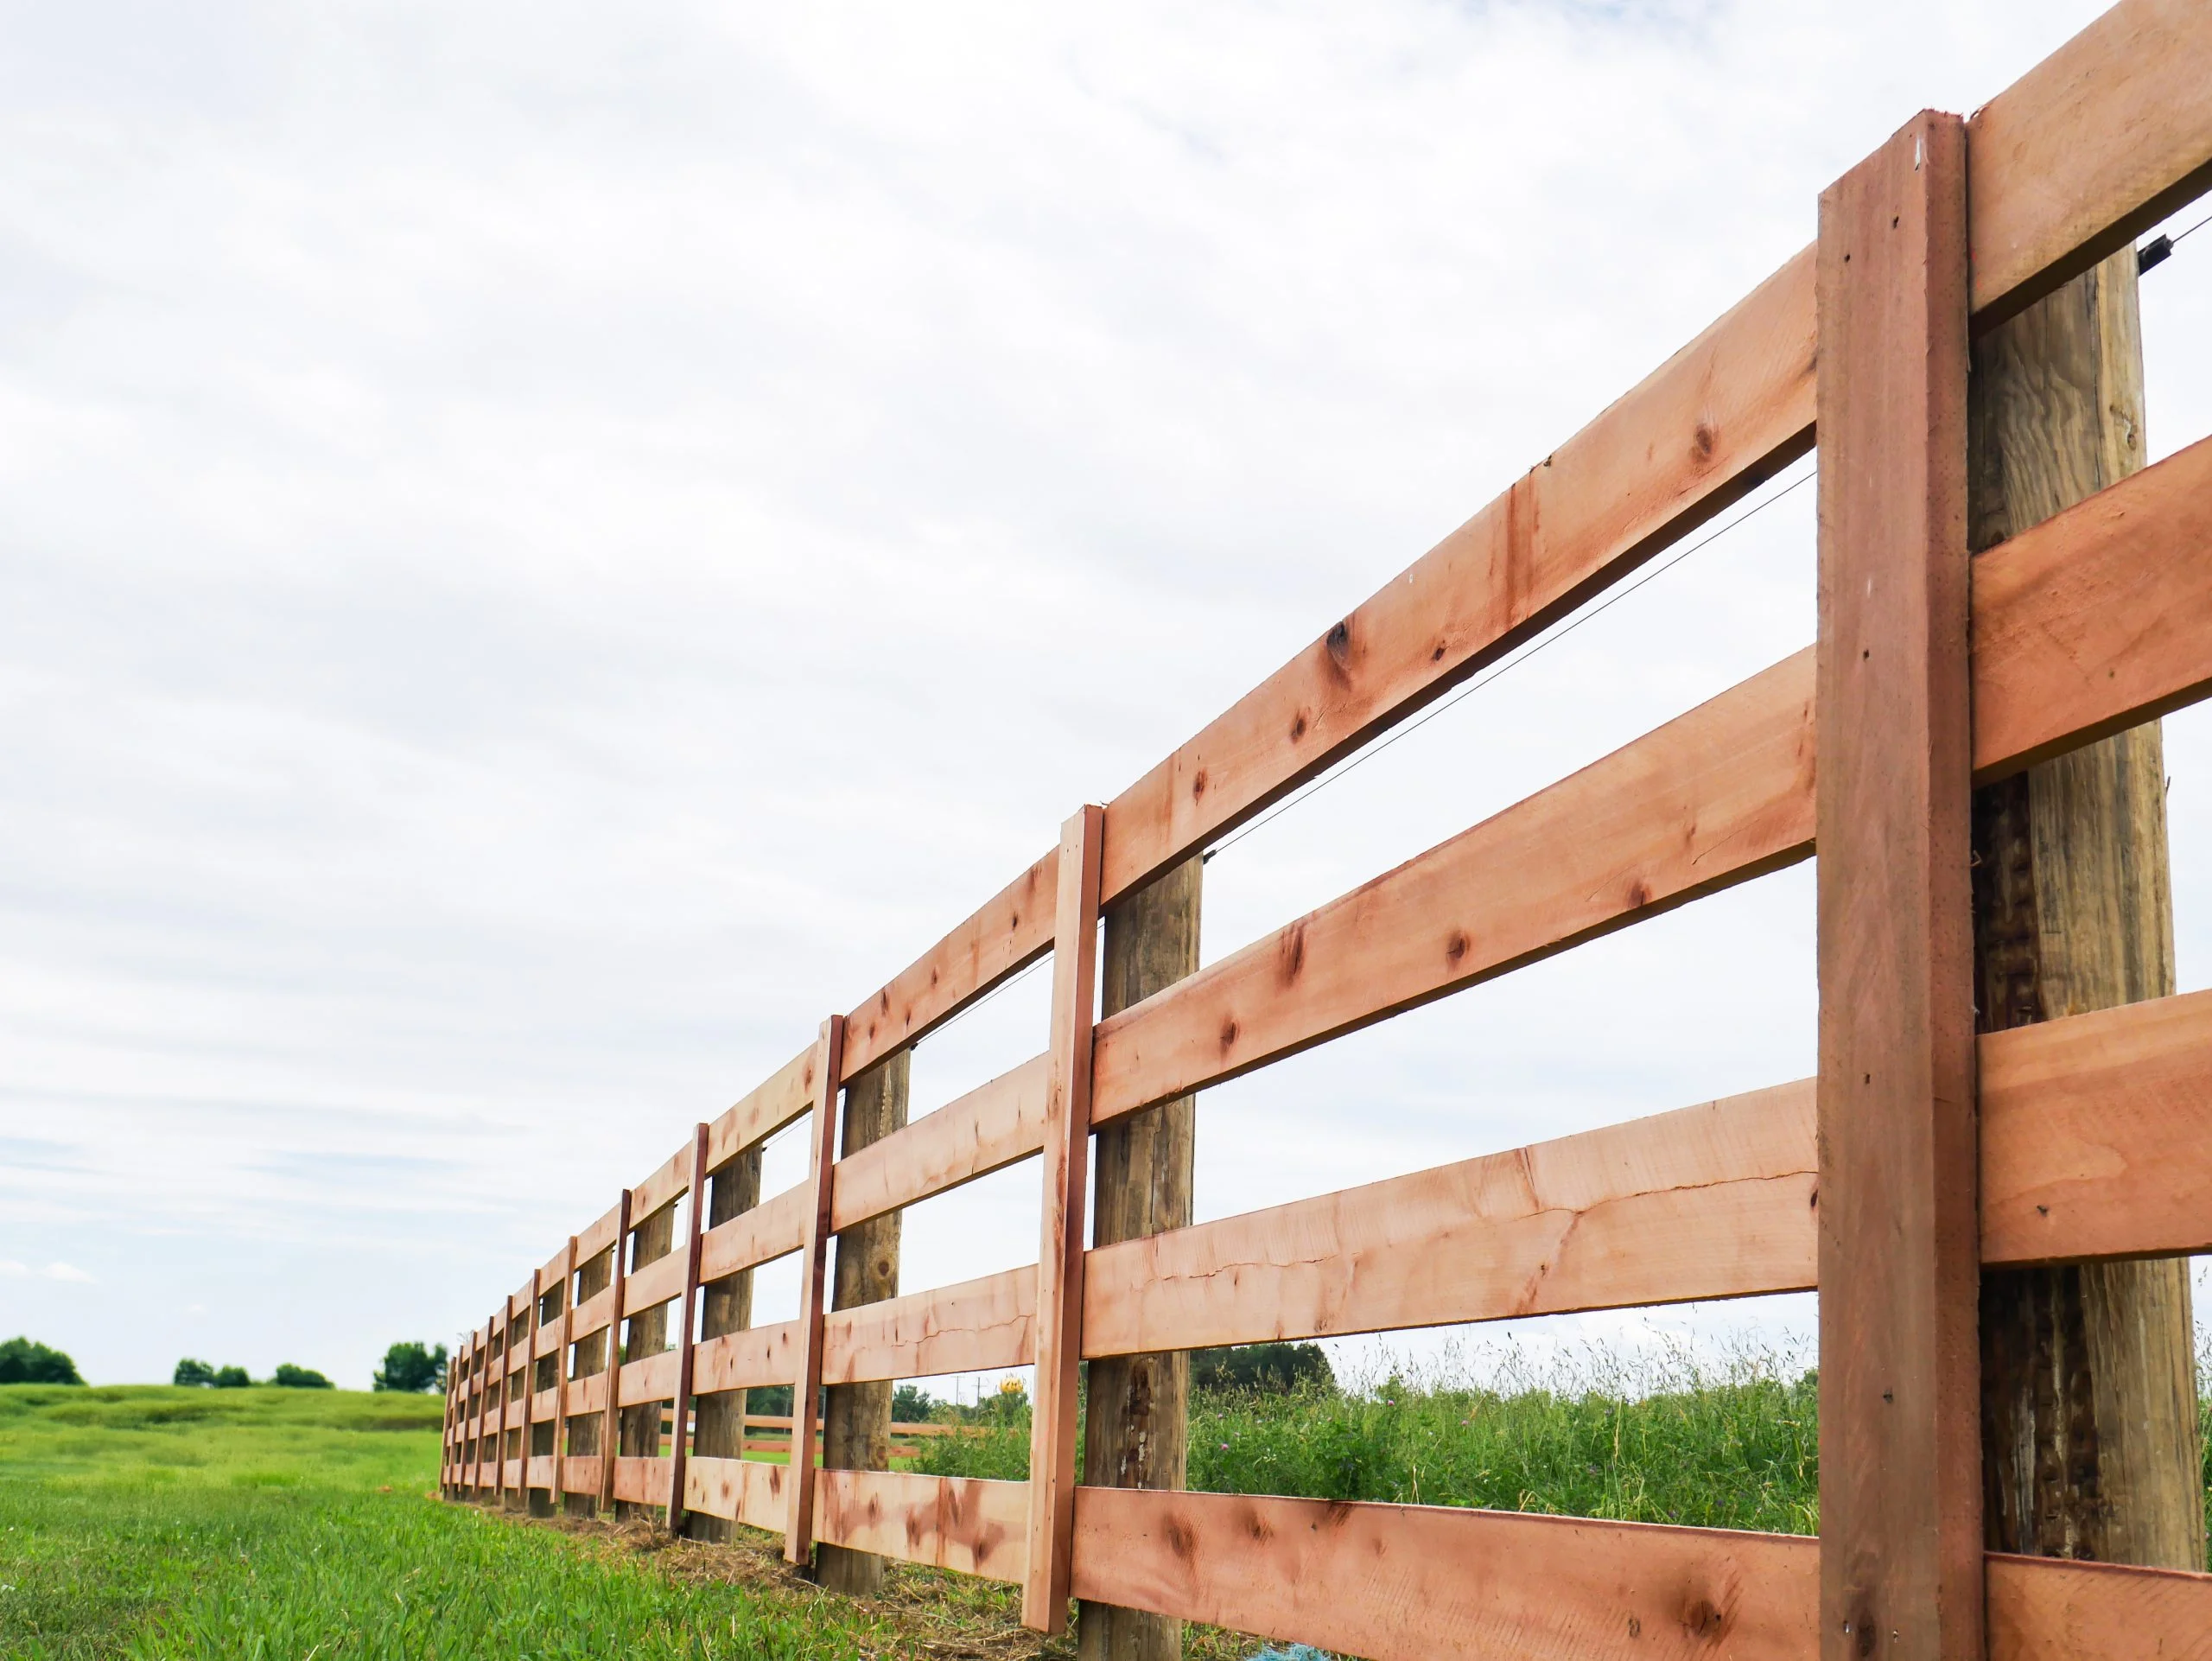
How to Build an H-Brace for Your Fence
An H-brace is the backbone of a strong fence.
If your fence has corners, ends, gates, or long runs under tension, this brace keeps everything standing straight.
When H-braces fail, fences lean, wires loosen, and repairs follow.
When they are built correctly, fences stay tight for decades.
This guide walks you through how to build an H-brace fence system step by step, explains why each part matters, and helps you avoid common mistakes that cause early failure.
What an H-Brace Does and Why It Works
An H-brace controls fence tension.
It transfers pulling force from the fence wire into the ground instead of allowing posts to lean.
The system works because:
- The diagonal brace wire carries the tension
- The horizontal brace stays in compression
- The second post acts as a brace anchor
Each component depends on the others.
If one part is weak, the entire brace loses strength.
Materials You Need Before You Start
H-braces require heavier materials than standard line posts.
Using undersized posts is one of the most common causes of failure.
For a proper H-brace, gather:
- Two heavy vertical posts
Six to eight inch diameter, eight to ten feet long
Pressure treated posts designed for ground contact - One horizontal brace post
Four to five inch diameter
Cut slightly shorter than the distance between vertical posts - High tensile or smooth brace wire
Twelve and one half gauge is standard - Fence staples or fencing nails
- Post hole digger or auger
- Level
- Wire tightener or fencing pliers
Legacy Post & Supply treated posts are commonly used for H-braces because they are sized and treated for long term structural use, not just line fencing.
Proper Layout and Post Spacing
Correct layout sets the foundation for strength.
H-braces should be installed at every point where fence tension changes direction or builds up.
Use H-braces at:
- Fence ends
- Corners
- Gate openings
- Long straight fence runs
For spacing:
- Set vertical posts six to ten feet apart
- Eight feet is a proven standard for most fencing applications
- On long straight runs, install an H-brace every six hundred sixty to thirteen hundred twenty feet depending on fence height and wire tension
If a fence section will be pulled tight, it needs a brace.
Step One: Setting the First Post
The first post is the load bearing post.
It carries the full pull of the fence.
To set it correctly:
- Dig a hole three and a half to four feet deep
- Place the post straight and plumb
- Tamp soil or gravel tightly in layers
Many experienced fence builders prefer tamped soil or gravel over concrete for tension fences. Properly compacted material allows slight ground movement without breaking the bond around the post.
Take time here. A poorly set end post will compromise the entire fence.
Step Two: Setting the Second Post
The second post supports the brace system.
It must match the depth and alignment of the first post.
- Measure six to ten feet from the first post
- Dig the hole to the same depth
- Set the post perfectly vertical
- Align it carefully with the first post
- Tamp firmly until solid
Before moving on, check both posts with a level from multiple sides.
Fix alignment now while adjustments are easy.
Step Three: Installing the Horizontal Brace
The horizontal brace keeps the posts from pulling together.
Its placement depends on fence height.
General placement guidelines:
- For four to five foot fences, place the brace twenty two to twenty four inches below the top
- For eight foot fences, place the brace thirty four to thirty six inches below the top
For best results:
- Cut shallow notches or drill pockets so the brace sits flush against each post
- Drive the brace tightly between posts
- Secure each end with two to three large nails, spikes, or structural screws
The brace must push against the direction of fence pull. If it is installed backwards, the system will not hold.
Step Four: Installing the Diagonal Brace Wire
The brace wire provides the real holding power.
Without it, the brace will fail under load.
Install the wire as follows:
- Start at the bottom of the end or corner post
- Run the wire diagonally to the top of the second post
- Staple loosely at both ends
- Use a wire tightener or fencing pliers to tension the wire
As you tighten, you should see the horizontal brace become rigid. This compression is what locks the system in place.
Do not over tighten. The wire should be firm, not twisted.
Step Five: Final Checks Before Fencing
Before attaching fence wire, test the brace.
- Push against the end post
- Apply light tension by hand
- Confirm the posts do not move
- Make sure the brace feels solid and stable
If anything shifts, correct it now. Once fencing is installed, adjustments become harder.
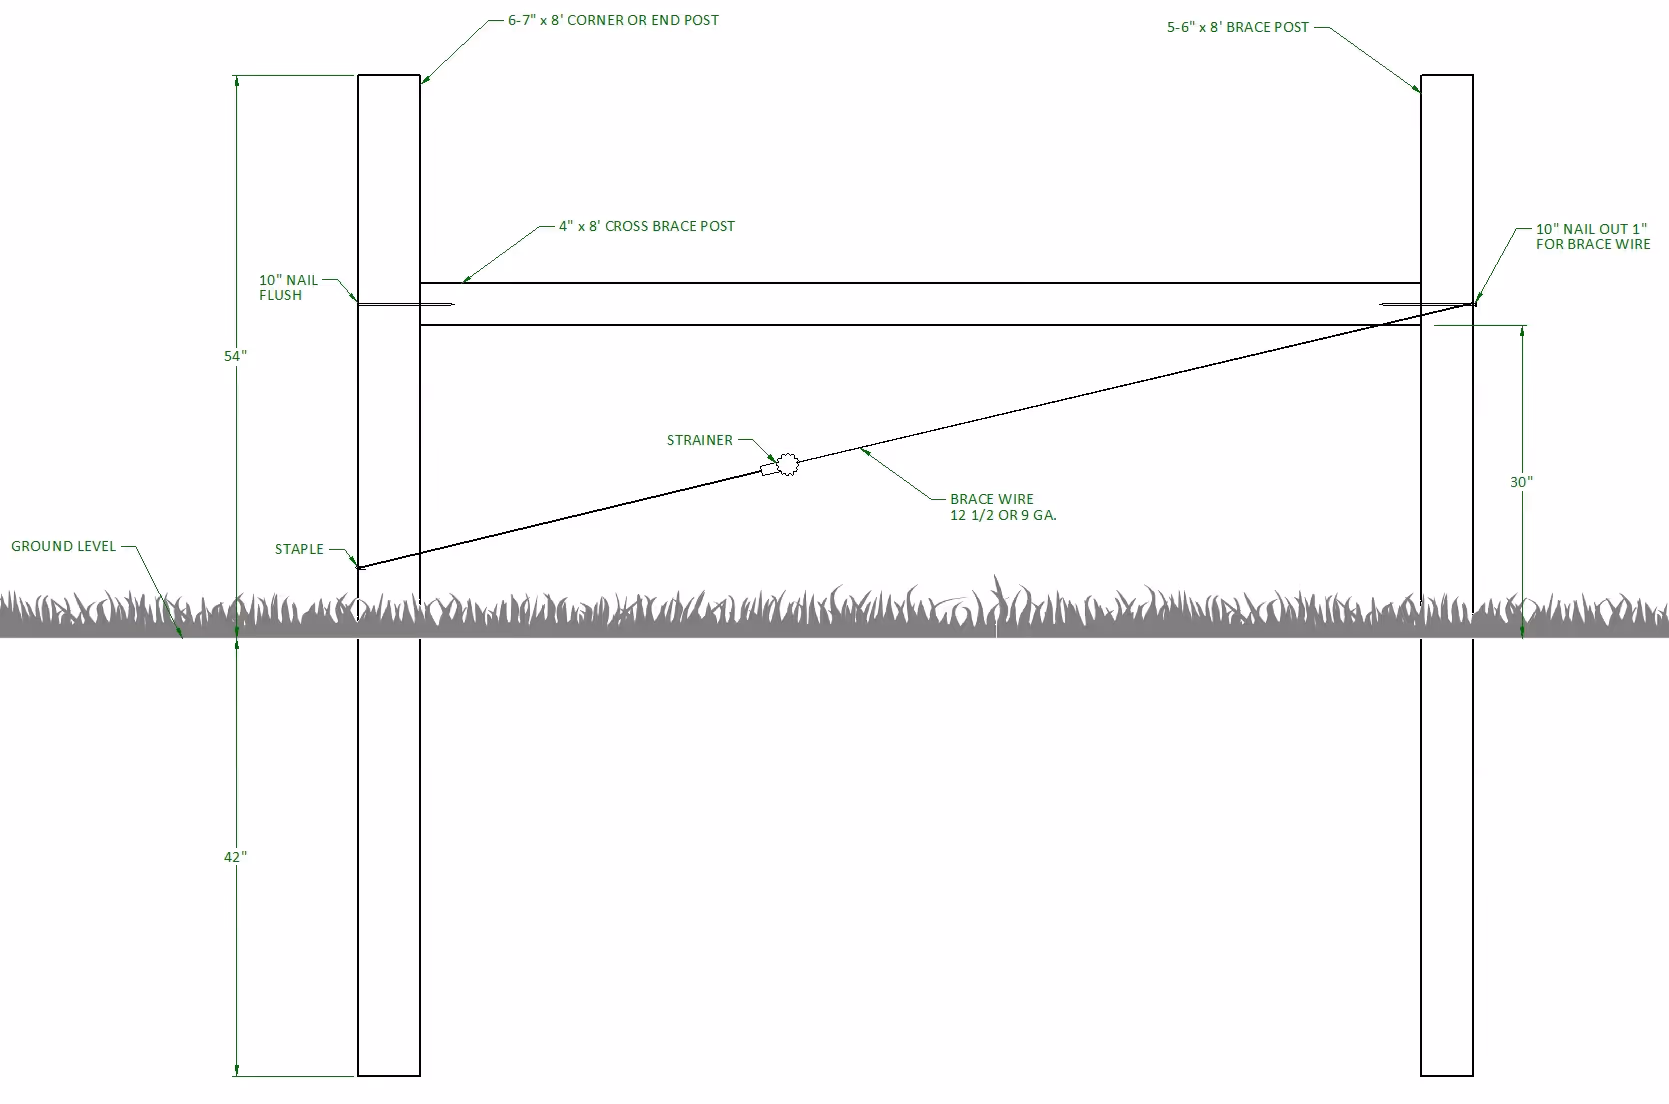
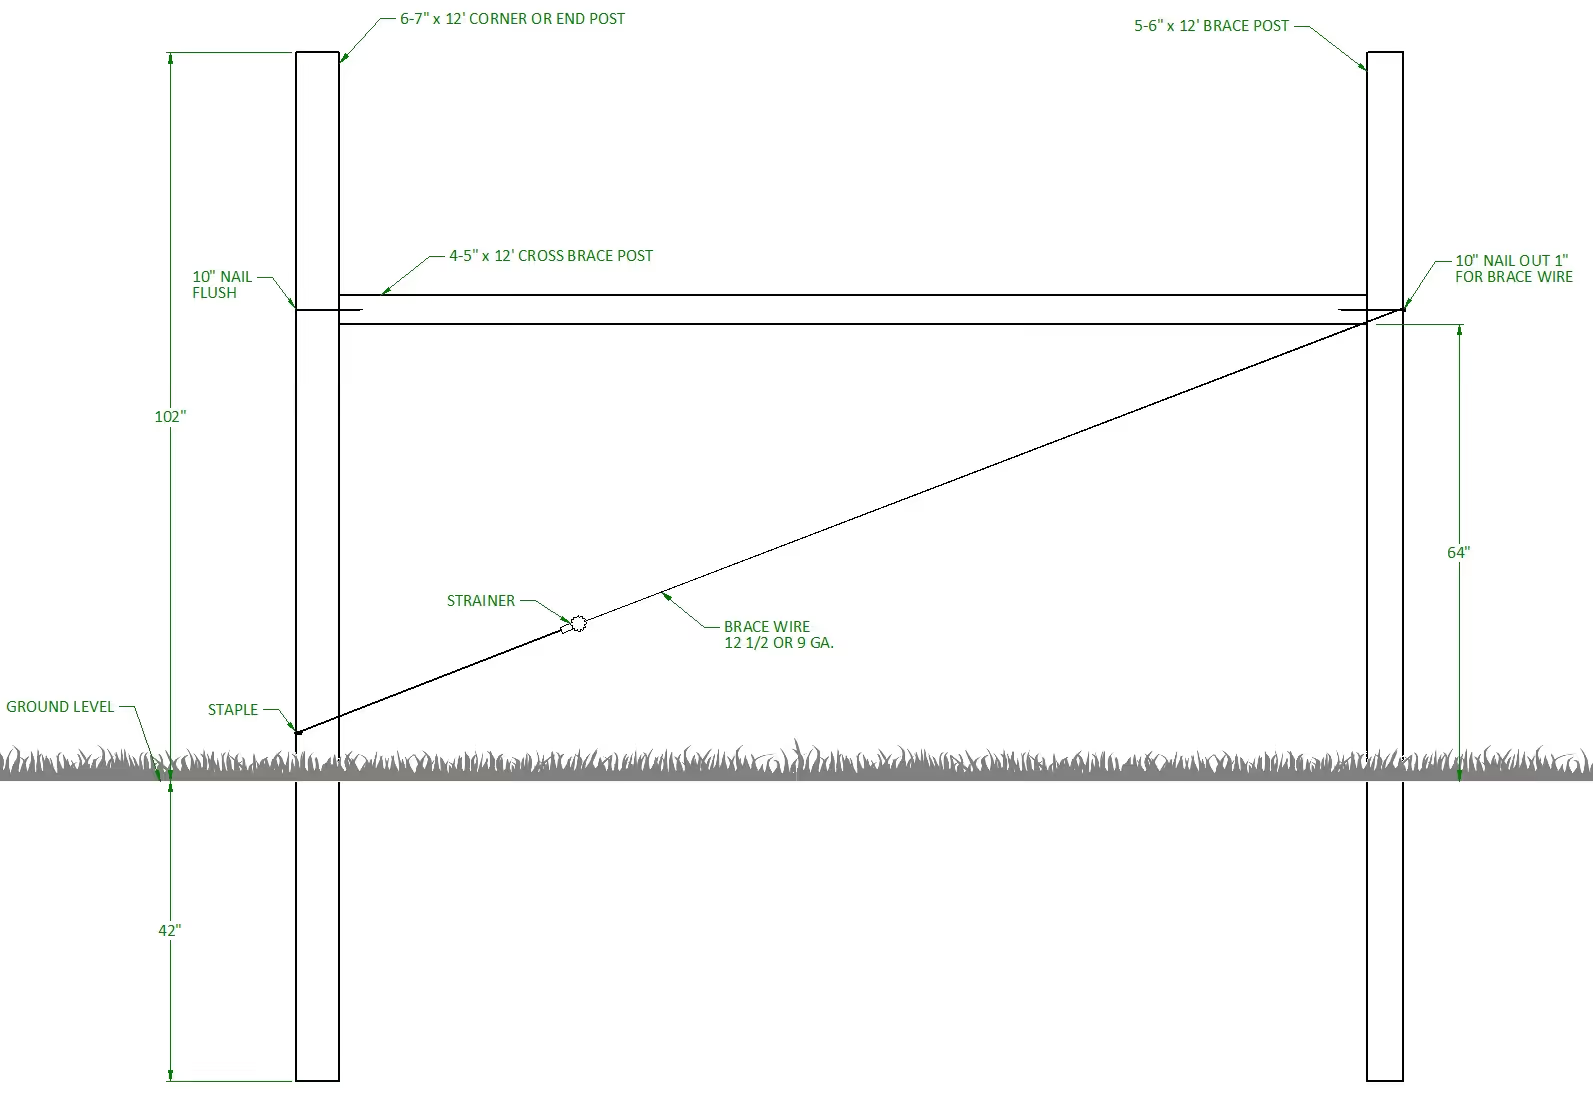
H-Brace Fence Diagram:
Common Orientation Mistakes to Avoid
Many H-braces fail because of incorrect wire placement.
Always remember:
- The brace wire runs from the bottom of the end post to the top of the brace post
- The horizontal brace pushes back against fence pull
Reversing either component causes the brace to collapse under tension.
Practical Tips for Stronger H-Braces
Experienced fence builders follow these best practices:
- Always use larger diameter posts for braces than for line posts
- Set posts deeper in sandy or loose soil
- At corners, build two H-braces, one in each direction
- Never rely on concrete alone without brace wire
A fence is only as strong as its bracing system.
If you build your H-braces correctly using properly treated posts, the rest of the fence becomes easier to install and maintain.
Legacy Post & Supply provides treated posts designed to handle the stress of corners, gates, and long fence runs, helping your fence stay straight and secure year after year. Contact us today for all your fencing needs.
Quality You Can Trust
Experience the quality of Legacy Post & Supply products firsthand. Contact us today to discuss how we can help or to request a free quote.